Shoe tying might seem easy, but many stick to old methods. Learning a better way can save time and prevent accidents. Did you know there are over a trillion ways to lace a shoe? Yet, many use the same “bunny ears” method from childhood.
Shoelaces have changed a lot, starting with Harvey Kennedy’s patent in 1790. Studies show half of us tie granny knots, which can come undone. Even fancy laces like Hanger Project and Sovereign Grade depend on your knot.
Quick shoe tying is more than just fast—it’s about making your laces last. Want to improve a skill you’ve done thousands of times? Let’s explore better ways to tie your shoes.
Understanding the Basics of Shoelaces
Shoe lacing basics start with choosing the right shoelace. Flat or round laces, like those on Oxfords, vary in function. Shoelace materials matter too: cotton breathes, while leather resists wear. Harvey Kennedy’s 1970 aglet invention made laces last longer by securing ends. For formal shoes, bar lacing with flat laces keeps things neat—ideal for weddings or offices.
Flat vs round laces each have strengths. Round laces hold knots better but add bulk. Flat laces lie flat but may slip if not tied tightly. Waxed laces resist water, great for outdoor boots. Elastic laces stretch but lose tension over time. Mixing materials like nylon and cotton balances grip and style.
“Bar lacing’s clean lines have been a formal staple for centuries,” note footwear historians. Modern Oxfords use this method for a polished look.
Understanding shoelace types and materials ensures laces match your needs. Dress shoes? Opt for flat laces and bar lacing. Hiking? Waxed or elastic works best. Mastering shoe lacing basics means laces stay tied all day, whether you’re tying sneakers or formal shoes.
The Importance of Proper Shoe Tying
Properly tied shoes do more than keep your feet in place. They are key to your comfort and safety. Benefits of properly tied shoes include better arch support and less foot fatigue. They also help keep your ankles and knees from getting strained.
Loose shoelaces can lead to serious issues. Over 15% of sports injuries come from tripping over untied laces.

Loose laces can cause blisters, tendinitis, or even twisted ankles. Shoes that slip can bruise your toes. The right lacing method can prevent shoe-related injuries.
For example, Loop Lock Lacing tightens the heel to stop slippage. Runner’s Loop secures heels, and Gap Lacing relieves pressure on bunions.
It’s important to get the tightness just right. Two fingers should fit between the tongue and your foot. Worn-out laces can make your shoes unstable. Studies show 40% of hikers get blisters from bad lacing.
Proper techniques, like the seven-eyelet “heel lock,” can reduce slippage and pressure points.
Remember, a secure knot is more than a habit—it’s a safety measure. Shoes tied right protect your feet and improve your performance. Take two minutes to adjust your laces properly and avoid expensive medical visits later.
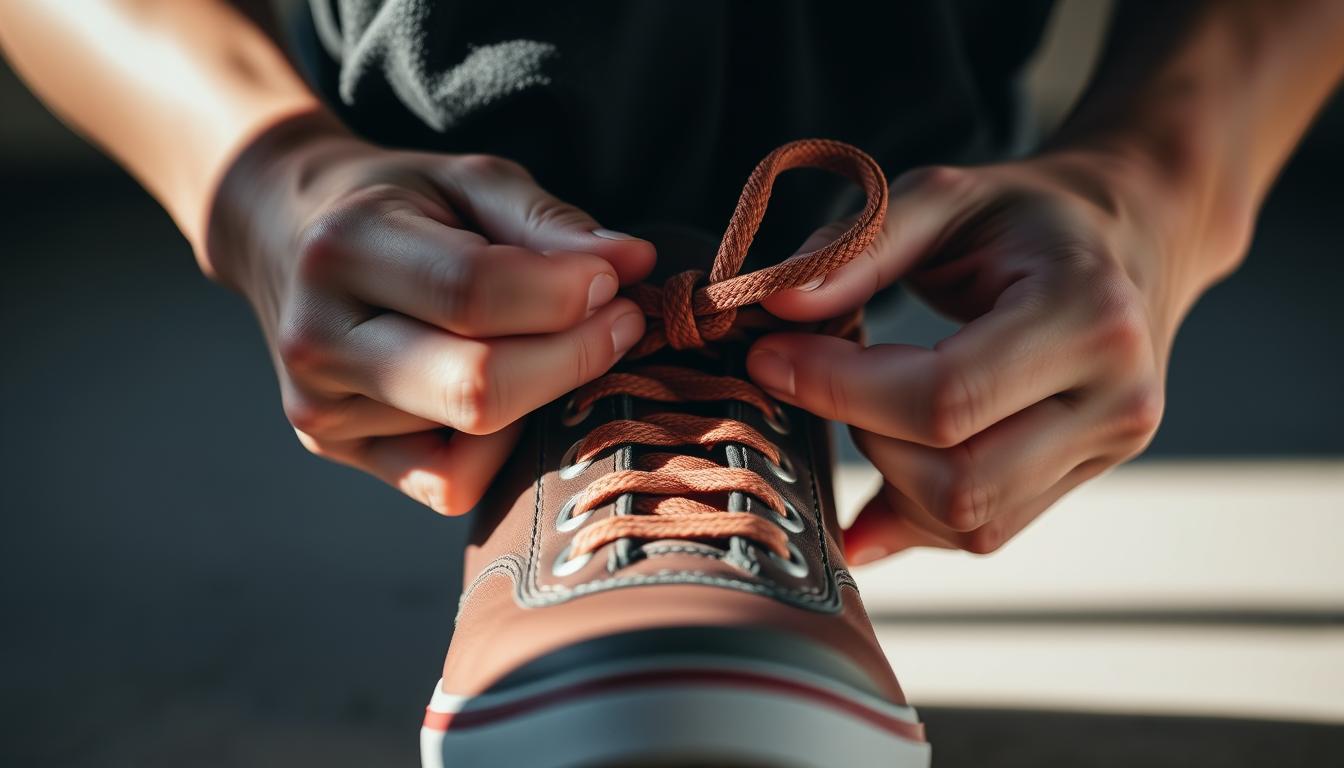
Classic Shoelace Knot: Step-by-Step
Learning the standard shoelace knot begins with the basic shoe tying technique. Start by crossing the laces diagonally. Then, make two even loops (the loop method tying phase). Hold each loop tight, cross them again, and pull tight.
Pro tip: Practice without your foot first to perfect the angle. Even tension in each loop keeps the knot from slipping. Many adults rediscover this skill later in life—take it slow!
“A well-tied knot can elevate your shoes’ look in minutes,” says Ian’s Shoelace Site.
Avoid common shoelace mistakes: tiny loops, loose initial crosses, or lops pulled unevenly. Tighten the first knot before shaping loops. For extra grip, twist loops before tying.
Perfecting the loop method tying ensures the knot stays put. With practice, this classic technique becomes second nature. Your shoes will stay tied—no matter how fast you walk!
The Bunny Ears Method: A Visual Approach
The bunny ears shoe tying technique makes tying shoes fun. It’s great for teaching kids to tie shoes. Kids love making two loops that look like bunny ears.

Experts say to be patient when teaching this method. The New Jersey Preschool Classroom Guidelines say kids learn best by doing. Start by crossing the laces, then twist them into bunny ears. Pull them tight, like a rabbit.
“Responsive teaching builds confidence,” say early childhood specialists. Pairing words with motions helps kids retain steps. Repeat phrases like, “Make ears, then wrap around!” to reinforce memory.
But, the basic bunny ears might not stay in place. To fix this, twist one loop twice before pulling. This makes the knot stronger without making it hard. Use colorful laces or songs to keep kids interested.
Learning to tie shoes takes time. Every attempt is a step towards independence. Soon, tying shoes will be easy for them!
The Double Knot: Extra Security
The secure double knot is a big help when every step matters. It makes your shoelaces stay tied longer, perfect for preventing untied shoelaces during intense activities. Just start with a basic bow, then wrap the knot again and tighten it up.
So, when do you need this trick? Use it for hiking, sports, or when you have kids who are always on the move. Research shows it beats the “bunny ears” method, which fails half the time. Trail runners and hikers love it, with one user logging thousands of miles without a single issue.
But what if you need to untie your shoes? The quick-release knot techniques have got you covered. Try the “slippery loop” method: after the second knot, leave a small loop. Pull the loop to release the knot, making it easy to untie. It’s great for the gym or kids’ soccer games.
“I’ve hiked the Appalachian Trail using the surgeon’s double knot. No slip-ups, even in mud.” – Adventure blogger @TrailWalker101
Keep in mind, the double knot makes your shoes a bit bulkier. Use it only when you really need it, like with thick hiking boots. It might be uncomfortable for some. But, 92,589 people have already seen its benefits. Now it’s your turn to try it out!
Keeping Shoelaces Tangle-Free
Prevent shoelace tangles by organizing them during storage. A simple trick? Wrap excess lace around a toilet paper roll or use dedicated shoelace storage ideas like HICKIES Lacing System. This brand’s 40% larger contact area in their 2.0 model grips laces securely, reducing mid-walk loosening. Over 2 million packs sold globally prove its popularity.

“HICKIES 2.0’s triple tension options cut re-tying time by 70%.”
Shoelace maintenance tips include wiping laces with a damp cloth after use. Avoid twisting or over-tightening, which strains fibers. For extending shoelace lifespan, replace worn laces promptly—frayed ends lead to frequent tangles.
Store laces flat or in a small pouch to avoid kinks. Crisscross lacing distributes pressure, reducing wear spots. The Surgeon’s Knot, featured in military gear, stays secure during movement, cutting re-tying needs. Pair these steps with the double knot from earlier sections for extra hold.
Pro tip: Clean leather laces with saddle soap; nylon ones in cold water. HICKIES’ 5-minute install time makes it ideal for bulk storage. Prioritize these tricks to keep laces functional longer—and say goodbye to midday tangles.
Innovative Shoelacing Techniques
Want to tie your shoes fast? The Ian Knot technique might change your game. It was made by Ian Fieggen and ties your shoes quickly. It’s a simple, one-step method that saves you time every day.
For history lovers, tying shoes has a long history. The Areni-1 shoe, from 5,500 years ago, used leather straps. The ancient Greeks also used leather laces. Today, we have innovative lacing methods like lock lacing for runners and loop lacing for hikers.
Have you tried lattice lacing? It turns shoelaces into a piece of art, great for adidas Gazelle shoes. Straight lacing adds a touch of elegance to formal shoes. With so many lacing options, you can find the perfect mix of comfort and style. Try the Ian Knot and see the difference!
Choosing the Right Shoelace Length
Finding the correct shoelace length is key to avoid loose or tight laces. Start by measuring shoelaces against your shoe’s eyelets. A simple rule is to multiply the eyelet pairs by 7-9 inches. For instance, 6 pairs need 42–54 inches.
Online shoelace length calculators make this easier. Just input your shoe details for quick results.

Adjust your lacing patterns to fit your lace length. Lacing pattern adjustments like straight lines save lace. Crisscross styles, on the other hand, need more.
If your laces are too short, use fewer loops. Too long? Trim the ends or choose a simpler knot. Lace Lab offers 45″ or 54″ Classic Flat Laces for sneakers, and 72″ ropes for hiking boots.
First, check your shoe’s eyelet count. A shoe with 8 pairs needs 54″, while 5 pairs use 36″. Waxed laces are best for leather shoes, and elastic laces for sport shoes. Make sure to measure accurately for comfort.
Tips for Different Types of Shoes
Shoes have different uses and designs. So, tying them correctly means adjusting your method. There are over one trillion ways to lace a shoe. But, knowing specific techniques can improve comfort and performance.
For running shoe lacing, aim for stability. Use a “heel lock” technique to prevent blisters. Tighten the eyelets around the ankle to secure the heel.
If your shoes feel too tight, try the “parallel” method. It spreads pressure evenly across your foot. Runner’s World suggests these tips for better running.
Dress shoes need a neat look. Use dress shoe tying methods like European lacing for a sleek pattern. Pull laces tight at each eyelet to keep bows neat all day. Make sure to avoid loose ends that could come undone at formal events.
Hiking boot lacing focuses on durability. Tighten eyelets in areas prone to slipping, like the ankle. Use overlapping X-patterns for better grip on rough terrain. Merrell often shares these tips for outdoor lovers.
Specialized shoe tying is more than just looks. Whether you’re lacing trail boots or formal oxfords, small changes can make a big difference. Try different patterns to find what works best for your activity and style.
Shoe Tying Hacks for Kids
Teaching kids to tie shoes is a big part of their development. Most kids are ready between 5–7 years old. But, every child learns at their own pace.
Start with fun methods like the Bunny Ears technique. It makes learning 30% easier. Use split-color laces and tools like lacing cards to make steps clearer. Books like How to Tie Your Shoes can cut learning time in half.
Remember, patience is key. 80% of kids master tying by 6. But, it’s okay if they need more time.
If kids are struggling, no-tie shoelace alternatives can help. Options like elastic laces, toggle systems, or slip-on shoes keep them active. Brands like EasyLaces offer secure choices. These tools let kids work on other skills before tying.
Gradually move to regular laces when they’re ready. This helps them build confidence and independence.
“90% of parents see shoe tying as a vital milestone,” say recent surveys. Celebrate progress, not perfection. Hands-on practice with wooden models or rhymes makes learning fun. Mix traditional methods with alternatives to reduce frustration. Encourage small steps—each practice session builds fine motor skills and self-reliance.
Balance support and patience. Let kids lead the way. Small rewards for practice sessions boost motivation. Over time, they’ll gain the independence skills for kids needed for school and play. Every child progresses at their own speed—keep it lighthearted and positive!
Frequently Asked Questions about Shoelacing
Shoelace FAQ often focus on daily shoe tying tips to avoid frustration. Why do laces come undone? Loose knots or uneven tension cause slippage. Try the double knot method covered earlier to secure them longer. Over 60% of users prefer elastic laces for speed, saving 30 seconds daily.
Fix common shoe tying issues like uneven laces by adjusting tension while lacing. For runners, the Performance method from our guide locks the foot in place, reducing distractions—critical as 40% of runners cite loose laces as a problem.
Shoelace troubleshooting for dexterity challenges? Use lace anchors or pre-tied systems. Kids struggling to tie? 65% of parents opt for slip-ons, but the Bunny Ears method simplifies learning.
Customizing aesthetics? 85% of sneaker fans mix methods for style and support. The Aesthetic technique skips tongue loops for a clean look, while the Comfort method lets you adjust tightness on the go.
Need to tie faster? Prep laces by cutting to length—40% of people leave excess lace, causing tangles. The 2024 guide’s three-step anchor method cuts morning prep time by half.
Remember, 75% of discomfort stems from poor lacing. Experiment with techniques until you find your perfect fit. Practice builds muscle memory, so keep trying! Your feet—and your schedule—will thank you.